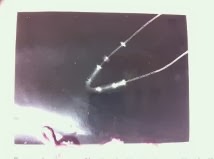
This
is my first attempt of photograms. I placed my necklace onto photosensitive
paper and exposed it to light for two, then four, then six, then eight, then 10
seconds. It didn’t come out as well as I’d hope however it was my first try.
This is my second attempt and here I placed all
of my bracelets onto the paper and exposed it the same way I did the first.
When developing I put them in the developing chemistry for 3-5 minutes and then
stopped the developed for 30 seconds. Then I fixed the print for 5 minutes and
then washed for one minute. I like this
one a bit better however still not what I wanted.
This is the third one I attempted and I am
much happier with the results because I made the exposure slightly longer.
This is where I attempted to get a print by
using my previous print. I put my last print onto the paper so then when it was
developed the black would come out white and the white black. However I got the
focus wrong so it came out very blurred and not lined up.
This
is another where I tried to print a twenty pound note how ever I wanted it to
be slightly blurry so I tried taking it out of the developer chemistry early
and I got this result which I like and I am happy with the final print.
This
is my first print that I have nothing I would change with it. All the objects
have come out very clear and crisp and I generally just think it’s a nice out
come.
This
was my first attempt at blue toning. I created a normal photogram the same way
as the others and then I placed it in a blue dye. I wanted it to come out very
blue instead of tinted so I evenly covered the print with the dye for about ten
minutes and I really like how it has come out. I want to try the copper and
sepia tones also to see what results I can get.

We then started taking pictures and
developing film. This is a contact sheet I created of my photos. To get this
result I when into the pitch black room with a film holder, the roll of film, a
film opener, a pair of scissors and the container you put the holders into to
stop exposure. I opened the roll of film with the opener and then cut the one
side into a triangle to make it easier to guide into the holder. After sliding
in the film and twisting it all into the holder I cut off the excess roll. Then
I placed the holder into the container and securely closed it so it wouldn’t
get exposed. Later I mixed the chemistry and poured the developer into the container
and left it for 15 minutes and agitated it every 30 seconds. Then I put the stop
in for five minutes with agitating every thirty seconds and the same for the
fix. Then when washing it out I used warm water so then the film doesn’t snap
because of the temprature change.
I
then took them out of the holder and clipped hooks on one side and weighs on
the other so they were not rolled up when I put them in the dryer. I left them
in dryer for twenty minutes. After they
are dried I placed them on the light box and cut them into six picture strips
and then slide them into a sectioned poly pocket. After this is created this
print which is called a contact sheet by putting a piece of photographic paper
underneath the sectioned poly pocket and exposed it for several seconds before I
developed, stopped, fixing and washed the picture.

This is one of the images I created after
making the contact sheet. To get these photos I simply enlarger the film. I
started by cutting the film into individual photos and then sliding them into
the enlarger upside down, bottom first.
Then before placing the photosensitive paper under the enlarger I turn
on the light to project the image on to the table and adjust the size and the
focus to make it a sharp image and to make it the size of the paper I was
using. Then after everything is ready I turned the light off, put the paper
into place and then exposed the image to the paper for approx. 6 seconds. Then I
developed, stopped, fixed and washed the paper to get this final image. So far I
find this is my best outcome of photography and I find it has come out very
sharp and not blurred. I am very happy with this outcome and will definitely
use this again in my photography work.